
Soft Launch
Posted: 31/01/2013 Filed under: Business, Craft, Quilting, SW101, SWCustomerContributions, SWeco, SWhowto, SWmain, SWpress, SWProducts, SWpromotions | Tags: craft, Knitting, lingerie wash, lizzy house, lornas laces, quilting, soak 1 CommentThere are many definitions of a Soft Launch. Today it’s the unoffical announcement of our new scent, Yuzu and our new Soakbox, Elvis Paisley.
Yes, it’s a bit crazy to use this format for such exciting news, but sometimes, that’s just how it goes. The official launch will be the week of February 11th, where you’ll get more details on what we are up to than you could ever hope for. Until then, here’s the long and short of our exciting accomplishments.

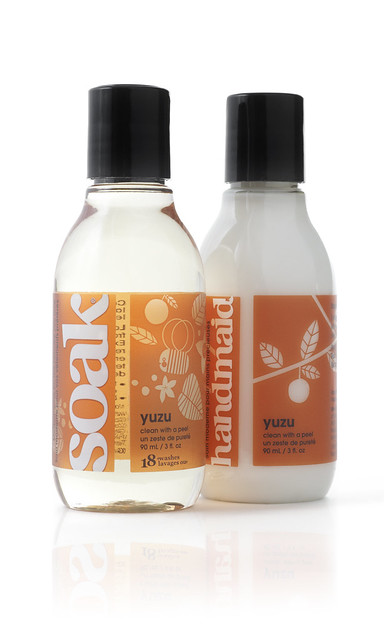
First: Yuzu. It’s the scent you’ve been waiting for. It’s so lovely it’s a bit silly. It is a kiss of tart citrus + crushed eucalyptus. It is currently available in our 3oz Soak bottles and 3oz Handmaid. It’ll be showing at TNNA this weekend, and on our website for sale (wholesale and retail) in the next week or so.
Second: You may notice Yuzu’s unique and lovely label. It’s the first in our upcoming series of designer labels. This label collection (yes, all 8 tiny bottles have different labels) is designed by the lovely and talented traditional fine art printmaker, and a turncoat commercial textile designer Lizzy House. Collectible, indeed.

Third: Yuzu appears in our newest Soakbox, Elvis Paisley. Once again, we’ve got a lovely custom color by Lorna’s Laces and a beautiful pattern designed by Fiona Ellis. We’re telling you this because in hours, we fly to The National Needle Arts Tradeshow in Long Beach where images, tweets and posts about these new products will surface and spread like, well, like new Soak scents do.
Here’s a sneak peek at the products. Between flights, set up and tradeshow time, we’ll do our best to get these products up and online sooner than later.
If you are a Soak retailer or would like to be, email chris@soakwash.com to order any of these products. If you are looking to shop, ask for them at your favorite yarn shop, bra fitting boutique or visit our website. The products won’t go live for a bit (sorry) and the Soakboxes won’t ship until mid-March, when they ship to lovely yarn stores around the world.
Watch in the coming weeks for more details on all the tiny fragments of exciting news we’ve shared today. We wanted you to hear about the excitement from us first. Enjoy as it all unfolds! And thanks again for choosing Soak. We are forever appreciative of the love you’ve shown for our products. It’s truly Soakworthy.
Karen’s Wedding Quilt. (it’s for Chandler too, don’t worry)
Posted: 09/06/2011 Filed under: Craft, Design, Knitting, Quilting | Tags: quilting 4 CommentsAuthor: Jacqueline
Home is where the heart is and where I go to sew.
Summer as usual. Great classes at the workroom and my schedule is too busy to take one. Class in question this summer? Johanna Masko’s Machine Paper Foundation Piecing: Houses class. I’ve been meaning to make a wall hanging for home, (translation, smaller quilt project that can actually be finished and enjoyed in newly renovated apartment) and I’ve also been meaning to take one of Johanna’s classes. I keep daydreaming while reading Karyn’s blog, watching progress, enjoying the project sampler, dreaming of making my own house.
Weddings are also part of summer and I was looking forward to the wedding of my friend (and award-winning photographer, in case you need one) from college Karen, who lives in Brooklyn, NY. Originally from Montreal (we were immediate friends, both Canadians at RISD), Karen may soon be moving to LA. They’ll likely keep residences in both locations, as home is where the heart is.

While looking through their bridal registry, I realized that I really wanted to make them a wedding gift rather than buying one. I know their Brooklyn pad is small, so a full size quilt seemed neither practical nor realistic. Plus, if they are moving to LA, large objects are not ideal for transportation.
After a bit of thought, and growing jealousy as I saw students from Johanna’s class begin to construct their houses and landscapes, I realized that I could transfer my envy into a house of my own. A Brownstone, for Karen and Chandler, so that even if they move to LA, they can take a little piece of Brooklyn with them. Okay, so they don’t actually live in a Brownstone, but it is a beautiful building that called out to be drawn in fabric.
Here is the process of how this little building came to be. From Google maps, to drafting, fabric hunting, cutting, sewing, pressing and sewing again. Birds, flowers, windows and clouds all came together to make a one of a kind gift, a labour of love for my good friends. In my usual way, I paid great attention to the back as well as the front, drawing inspiration from the invitations for this personalized patchwork homage to their home.
Both tutorial and roadmap, may this journey inspire you to draw your own home in fabric.
Additional images can be found here. Enjoy.
Google Maps. Satellite. Perhaps the first useful reason to look up a friend’s home. The ability to retrieve many photographs of a building in another country, without having to send a friend into the street. For future reference, I did confirm with Karen that she did live in this building. Be aware, too many questions draws unnecessary suspicion.

I then sketched out a section of the building and used the handy dandy office photocopier to enlarge it to a reasonable ‘wall hanging’ size. From there, I taped it together and placed some graph paper on top. I am pleased to say I used the last giant piece of drafting paper I have held onto for decades. I never wanted to throw it out, knowing that one day, I’d actually use it. I am both glad I had it for this project, and glad it is out of my life. Storing rolls of paper is challenging.

I used a think marker to outline the structure and planned the various sized windows, doors, entrance and roof line.

I stopped at the workroom on the way home one night, to seek out the perfect stash of fabric for this project. Some sky, some brick, window materials and trim. I also asked a couple of unsuspecting crafters if this project seemed a bit crazy to take on, with less than a month until the wedding. They said yes. In retrospect, they were right, but I loved every minute of it, day and night.
Even though this piece will be wall art, I felt compelled to pre-wash all the fabrics with Soak. It was an Unleash kind of day. I am the one at the office who receives the calls when wall art quilt pieces suffer colour runs or other laundry crises, so always best to pre-wash.
First section first, a simple panel with some angles and sky. I wanted to ‘test the waters’ on this project. I realized, that unlike the formal class at the workroom, where paper piecing is an art form and each student’s house is the same size, I was drawing with fabric and my grids and graph paper were becoming more guides than gospel. As I completed the first panel, the project began to take on its own life and I became consumed.

The windows are my favourite part. I created tiny tuck pleats to replicate the panes of glass seen in the building. As I worked across the image, I took a break from bricks and windows to create the front entrance.
I made larger than life flower pots with liberty print flowers (what else?) and allowed the feature light bricks to become the focal point of the structure.

Since my satellite images blocked most of my view, I allowed myself creative freedom to imagine the building, or at least how the building might appear as if it were made of fabric. The castle top of the building proved great fun. An homage to my friend Katrina, I actually cut and measured exact squares with exact seam allowances so they’d be even.

When I finally finished the front, I realized I hadn’t yet considered the back. That same day, Karen’s wedding invitation arrived by post, providing inspiration for the back and finishing details. The shade of red and variety of prints in the invitation ( I LOVE envelope linings) sent me rummaging through my fabric stash in search of reds, dots and lines. I found the off-cuts of a quilt I made last year, pieces 6-12 inches wide from the trim of a patchwork back, in all shades of red. It was perfect.

Using my free-motion stitch regulator (thank you Ted) I named, dated and signed the quilt before assembling the various pieces of the back. It’s hard to see the writing, but that’s the point, I guess. It’s not obvious, you just need to know it’s there.

Once I finished the back, I pieced it with the front, batting et al.
I used my walking foot for most of the quilting, following the diagonal brick work designs of the original building and outlining some of the windows. I’m a bit addicted to stitching in the ditch. In my next project, I might purposefully avoid the ditch, in an uneven, asymmetrical kind of way. Once I had covered enough brickwork, I used the free-motion foot to embellish the lighter front of the building. I put the building number on the awning and swirled around until the fabric itself told me I was done.
I added some clouds to the sky and I was set.

I tried to find the perfect binding fabric and realized that the building needed to be a continuation of each pattern piece. The sky needed to continue and the building needed to continue. No framing necessary. I added three hanging ribbons along the top and sewed on the binding. I made a note to myself that I must either find my box of binding clips (clean my studio) or buy more. Random bobby pins will not cut it. It is worth noting though, that the paper clip worked shockingly well.

I’m giving them a Lantern Moon bamboo hanger as well. This is the kind I have at the office holding up another quilt. It’s my favorite. I don’t think it’s fair to give someone a hanging quilt without telling them how to hang it. Some people prefer invisible hangers, although upon investigation, I couldn’t find one that was both fantastic and readily available. I like this design, it matches the brickwork and hopefully Karen and Chandler’s home, be it in Brooklyn, LA or wherever their life takes them.

Baby quilts
Posted: 16/05/2011 Filed under: Craft, Design, Quilting | Tags: quilts Leave a commentBaby quilts. In between all the large quilts, beyond the list of wishful projects, regardless of how many times we promise ourselves we won’t start another project, there is always room for one more baby quilt.
I am about to start a new one, for my cousin and his wife in London. They are having a baby this summer. Baby quilts are the perfect place to explore new fabrics, try new techniques and be a bit adventurous, on a scale that is manageable both at home (be it dining room table or living room floor) and on the sewing machine.
Here are a few of my favourite recent baby quilts. They represent love and comfort, happiness and family. They are all pre-washed with Soak and machine washable. They are functional pieces of art meant to be used for generations to come.

Dafina, our office administrator is soon to return from her maternity leave. As English isn’t her first language, I felt that the ‘eye spy’ quilt was the perfect design for her young family. They can practice words in English and other languages for years to come. Ask if you can dip into your friend’s fabric stashes for this type of quilt- so you can find even more prints, images and animals than you have yourself.

Sofia enjoys her quilt at community play groups. Her mom, Patricia likes to have a piece of home wherever she goes. This quilt is made of squares and strips of Japanese baby prints. Word to the wise don’t make squares and even/ symmetrical borders on both the top and bottom of a quilt if you are a novice machine quilter. Lining up both the front and the back on both axis is challenging.

At quilt market one year I picked up this charming set of prints put together by a local quilt shop. I was itching to try this Amy Butler free pattern and thought this project was the perfect place. Both Ailie and Katie love this quilt. It is cozy, feminine and charming.

This quilt is made of my favourite collection of baby prints. It’s a cotton, linen blend and perfect for the sophisticated family that will soon acquire it. I learned many years ago, that while we want to gift our baby quilts as soon as the baby is born, babies don’t typically use quilts as blankets or floor mats for several months, so be patient with your project- it’s okay if the baby comes before the quilt.
 This lucky boy enjoys this modern bright quilt. Fabrics with feature patterns and vivid prints make charming additions to any play room.
While there is no shortage of baby inspired fabric, little quilts made from modern prints are timeless, unique and filled with love. Baby quilts have no size constraints, no formal rules and most importantly are always received with open arms.
101 things to do with Soak | 018 Fabrics. Quilting. Pre-washing.
Posted: 15/06/2010 Filed under: Craft, Quilting, Uncategorized, Uses for Soak | Tags: 101, hand washing, Jacqueline Sava, quilt, soak wash, soakwash, wash 3 CommentsAuthor: Jacqueline
Truth be told, I love it more than yarn. I love looking at it, cutting it, designing with it, wearing it and resting under it. My mom was a clothing designer. I grew up with fabric. I’ve recently acquired an exceptional stash of Liberty of London fabrics from a recent trip to England.
My first thought was to introduce these limited edition fabrics from the V&A collection to my stash immediately, so the various prints, colours and textures could get to know each other. My fabric stash enjoys new friends. I also had a few select acquisitions from the Liberty store itself but I wanted to include some of them in my summer quilting projects. I knew what had to be done. They all needed to be unfolded from their neatly packed pile and given a good Soak.
There are some basic rules to pre-washing quilt fabrics. We’ve talked about pre-washing fabrics for textiles in general, but here, we’re talking quilting specifically. The liberty fabrics I bought at the V&A suggested cold water wash, and discouraged drying, ‘do not tumble dry’.
First, if you are making a quilt that is going to be used, like this one which was a wedding present for my cousins in the UK, at some point it is going to be washed.

Second, if a giant quilt gets wet, it is likely to end up in the dryer, regardless of instructions. So, I recommend pre-washing and drying all fabrics.
I did wash and dry my liberty prints, fear not, I’ll share my secrets.
First, unfold all your fat quarters, yardage and fabric.

It is essential that the pieces be loose and relaxed when they go into the wash.

If you have (or have access) to a front loader, I would suggest using it. The agitation caused by the upright machines does add a bit of roughness to the washing (and it tends to increase fraying).
Use cold water, and of course, Soak.

Nothing too crazy happens in the washing machine. Sometimes, you get a bit of fraying at the edges, but mostly you just end up with a tangled bunch of fabric swatches. It is imperative to separate and loosen all the pieces again, before they go in the dryer.
Drying is an important part of the washing process, arguably, the most important. For my machine at home, 6-9 minutes on medium heat is enough to dry cotton. I highly recommend not leaving the room during drying. Your goal, when drying fabric is to remove most of the moisture, while leaving the fabric slightly damp so you can take it out, flatten it and keep it from wrinkling. Clearly I left my liberty print too long, it wrinkled. I am not looking forward to the arduous ironing that will follow. Every fabric and every machine commands different drying times. Once again, grab your favorite craft magazine, say, the summer issue of Studio magazine, featuring Soak and hang out in the laundry room. Your fabric will love you for it.

I remove a few pieces at a time, fold them in half and flatten them out. The continuous movement and heat from the dryer keeps the cotton soft and wrinkle free. If the dryer finishes and the cottons remain still, they will wrinkle. I suspect Liberty suggests not drying, to avoid wrinkling and the countless hours that follow, should one choose to try to iron the wrinkles out.
Here is my stack of fat quarters after I took it out of the machine. Note the small amount of fraying that occurred along the edges.

When I get my fabrics back upstairs, I drape them over chairs and other firm objects, to air dry.

Once dry, my fabrics were transferred to the stash where they took great comfort in all the other prints. Some were cut up for my summer project, as I mentioned, and more importantly, the rest are ready to go on a moments notice. There’s nothing worse than wanting to start a new quilt and knowing you have to do laundry first. That’s how unwashed fabric ends up in quilts. It’s never pretty, so wash new fabrics immediately for safe keeping.
Distracted by the liberty prints? Find them in Canada at Hyggeligt. Your local home for liberty prints. Both online and in a store front in London, Ontario, Hyggeligt is a haven for fantastic prints. I’m grateful that some of my chosen prints can be found there. I will never be without liberty again. Oh, and if you pass through, they also now stock Soak!

Share This


Settling in after a trip to the UK and New York
Posted: 30/03/2009 Filed under: Knitting, Quilting, Soak Stockists, Travel 1 CommentWe’re recently back from launching Soak in the UK at the Craft Stitch and Hobby show.
The launch was amazing- over 15 editorial pick-ups as well as signing on new stockists.
Here’s a sneak peak of our set-up with our new distributor EQS. We’ve also started the sample program in the UK, (Sample program: Are you a Soak retailer having an event or in-store promotion? We’ll happily send free mini-soak treats for your event, to launch and promote Soak to your customers. If you’re a guild/ stitch club member we can send you treats too, just tell us who your favourite shops are. Just ask!) so our stores there can introduce Soak in the same exceptional fashion we do on this side of the ocean.

We're all set up for the UK launch
Jacqueline’s Quilt Back
Posted: 19/11/2008 Filed under: Quilting Leave a comment
Originally uploaded by the workroom
This is the back.
Jacqueline’s Quilt Top
Posted: 19/11/2008 Filed under: Quilting Leave a comment
Originally uploaded by the workroom
This is how the top turned out.
Jacqueline’s quilt colour palette
Posted: 19/11/2008 Filed under: Quilting Leave a comment
Jacqueline’s quilt colour palette
Originally uploaded by the workroom
This is the start of my first quilt.


